
Paver Cleaning and Sealing: What to Expect, Step by Step
· By Ricardo Pessoa
In Central Florida, pavers take a beating. Strong sun fades the color, humidity and shade feed black algae and mildew, irrigation water leaves rust stains, and summer downpours wash sand out of the joints. A driveway or pool deck that looked sharp a few years ago can turn dull, green in the corners and patchy with weeds.
Professional paver cleaning and sealing reverses most of that. If you have never had it done, here is what to expect from start to finish, how long it takes, and how to keep the results looking good.
Step 1: A walkthrough and prep
A good visit starts with a quick look at the surface. The technician checks for sunken spots, loose stones, deep stains and how much joint sand is left, because cleaning will not fix structural problems. If a few pavers need to be reset, it makes sense to handle that before sealing so you are not sealing over a defect.
Next comes prep. Furniture, planters and grills are moved, nearby plants may be wet down to protect them, and doors, screens and pool equipment are noted so the crew can avoid blasting water where it should not go. On a pool deck inside a screen enclosure, extra care is taken around the screen frames and the pool itself.
Step 2: Pressure washing with a surface cleaner
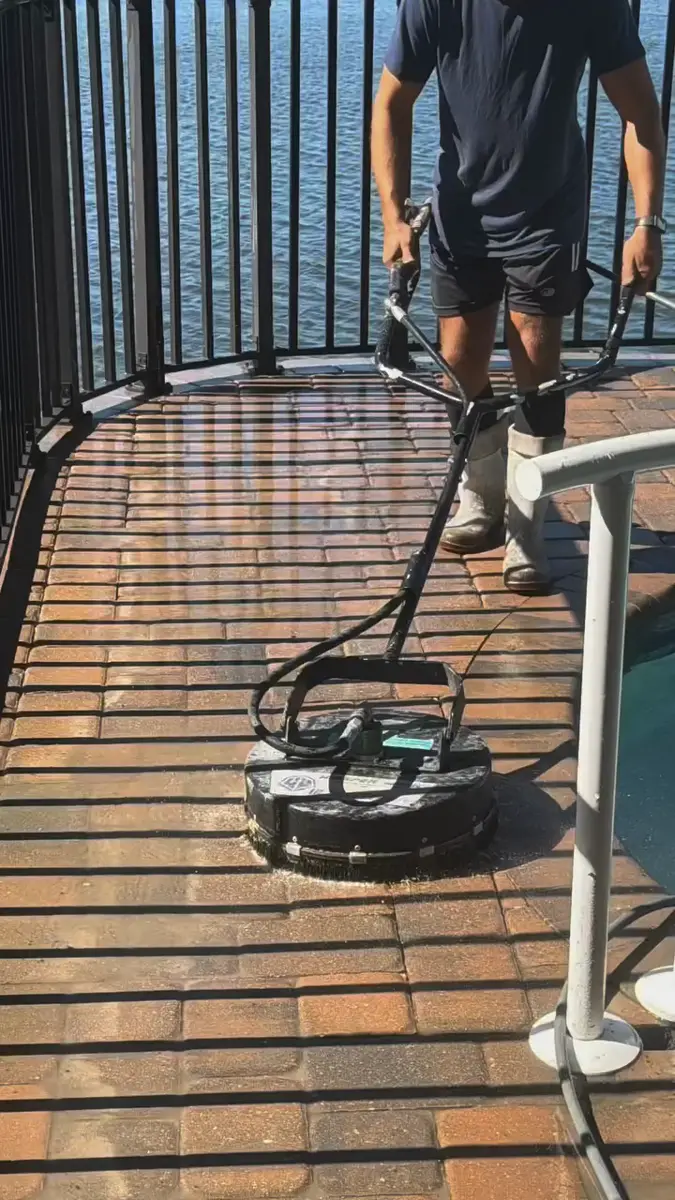
Most professional paver cleaning uses a pressure washer connected to a rotary surface cleaner, which looks like a round disc that glides across the pavers. It cleans evenly without the zebra stripes that a handheld wand often leaves, and it is much gentler on the joints than blasting with a narrow tip.
Black algae, mildew and organic stains may get a pre-treatment so they lift more completely. Oil spots, rust from well water irrigation and efflorescence (the white chalky haze some pavers develop) may need specific cleaners. Not every stain comes out completely, especially old oil that has soaked deep into the stone, so ask for an honest expectation before work starts.
Cleaning inevitably flushes out loose sand from the joints, which is expected. It also exposes how much sand had already been lost to rain and ants.
Step 3: Drying and re-sanding the joints
Before new sand or sealer goes down, the pavers need to dry. In Central Florida that can be a few hours on a sunny morning or longer on a humid or overcast day. Sealing damp pavers can trap moisture and leave a cloudy, milky look, so a careful crew will not rush this step.
Once dry, joints are refilled with sand, often polymeric sand that firms up when activated with water. Full joints lock the pavers together, help stop shifting, and make it harder for weeds and ants to move in.
Step 4: Applying the sealer
The sealer is usually sprayed or rolled on in one or two coats. There are a few general types. Some sealers soak into the stone and leave a natural matte look. Others leave a satin or wet look finish that deepens and brightens the color. Some are water based and some are solvent based, and each has tradeoffs in shine, slip resistance and how long it lasts.
For pool decks, slip resistance matters, so a natural or low sheen finish is often the safer choice for wet bare feet. Travertine pool decks are a special case: they are porous and stay cool underfoot, and they usually need a sealer made for natural stone rather than one designed for concrete pavers.
A quality sealer helps hold the joint sand in place, resists stains, slows algae growth and reduces fading from UV, which is a big deal under the Florida sun.
Step 5: Drying time and staying off the surface
Expect to keep foot traffic off for several hours and vehicles off a sealed driveway for longer, often a day or more depending on the product and weather. Your technician should give you specific times. Afternoon thunderstorms are the main risk in summer, so crews often seal early in the day and watch the radar.
Irrigation is worth planning for too. Turn off sprinklers that hit the pavers until the sealer has cured, then adjust heads so they do not spray directly on the surface every day, which feeds algae and leaves mineral stains.
How often to clean and seal, and what it typically costs
Many Central Florida homeowners clean and reseal every two to three years, with a lighter cleaning in between if algae builds up in shaded spots or around the pool. Driveways that see a lot of traffic, pool decks with heavy splash and areas under trees may need attention more often.
Pricing depends on square footage, how dirty the surface is, how much sand is needed and the sealer chosen. As a broad market reference, combined cleaning and sealing in the region often falls somewhere around 1.50 to 3.50 dollars per square foot, with heavy stain removal, travertine or small detailed areas sometimes costing more. That is only a general range. A free estimate gives you an accurate number for your surface.
Looks Good Pavers & Outdoors offers pressure washing and paver sealing across Orlando, Kissimmee, Clermont, Winter Garden and Davenport. Call or text (321) 287-5043 for a free estimate.
Frequently asked questions
- Is paver sealing really necessary in Florida?
- It is not required, but it helps a lot here. Sealer protects against UV fading, slows algae and mildew, resists stains and helps keep joint sand from washing out during heavy rain. Unsealed pavers usually need cleaning more often.
- Can I pressure wash my own pavers?
- You can, but a narrow pressure washer tip can etch the surface and blow sand out of the joints. A surface cleaner and proper re-sanding afterward give a more even result and protect the interlock between the stones.
- Will sealing make my pool deck slippery?
- Some high gloss sealers can make a surface slicker when wet. For pool decks, a natural or low sheen sealer, sometimes with a slip resistant additive, is the common choice. Ask about this before the sealer is applied.
- Why do my pavers look cloudy after sealing?
- A white or milky haze usually means moisture was trapped under the sealer, often from sealing before the pavers were fully dry or from rain too soon after application. It can often be corrected, but the best prevention is proper drying time.
Related services
Serving
Found this helpful? Make us a preferred source on Google.
Ready for an exact price?
Get a free, no-pressure in-home estimate. Real numbers for your home, not a phone guess.